Recently, I completed a new installation for Oracle 11g Weblogic server as part of the Oracle 11g SOA Suite configuration. Unfortunately I forgot the password. Here is how to reset the password for the weblogic admin account with Oracle 11g Weblogic (10.3.3).
Step 1: Set the environment for your Weblogic domains:
In our case, we are running Linux so we change to the Middleware directory set by the MIDDLEWARE_HOME variable
$ cd $MIDDLEWARE_HOME/user_projects/domains/{your_domain}/bin
where your_domain is the domain_name for your Weblogic domain as shown in below example:
$ cd user_projects/domains/fmw_domain/bin
Execute the setDomainEnv.sh script
. ./setDomainEnv.sh
Step 2:Run the copy command before we change the admin password for weblogic
$ java -cp /weblogic1033/oracle/wlserver_10.3/server/lib/weblogic.jar:$CLASSPATH weblogic.security.utils.AdminAccount weblogic mypass1 .
where weblogic is the admin username and mypass1 is the new password
Step 3: Reset the weblogic admin password with the following command:
$ java weblogic.security.utils.AdminAccount weblogic mypass1 .
where weblogic is the admin user account and mypass1 is the new password. Don't forget the period at the end of the command or this will not work.
In the future, if you do not want to set a password for the weblogic admin user, you can modify the boot.properties file as discussed in the following My Oracle Support note:
980292.1
Starting AdminServer Without Username/Password Prompt in WebLogic Server 10.3
Cheers,
Ben
Showing posts with label SOA Suite. Show all posts
Showing posts with label SOA Suite. Show all posts
Tuesday, December 21, 2010

Saturday, March 6, 2010
Fusion Middleware Integration with Oracle E-Business Suite: Part II: SOA Suite and Release 12
In the last post, we discussed how to install SOA Suite for Oracle Fusion Middleware. This post will provide some quick tips on how to configure Release 12 of the Oracle Applications E-Business Suite with SOA Fusion Middleware. As a caveat, I want to advise you all that all versions of Oracle EBS prior to 12.1 are not supported for SOA Fusion Middleware based on discussions with Oracle support. With that said, I will summarize the details. Since my test environment is 12.0.4 and SOA requires 12.1, I do not have actual screen shots yet. What I will do is to revisit the specifics in a future post once I have upgraded my test 12.0.4 EBS environment to 12.1.2 ( a lengthy process!). OK so lets get started.
The reference details are further contained and hidden away in a few key notes from MyOracleSupport (formerly Metalink):
Oracle Metalink Note: 755067.1 - Using Oracle BPEL 10g with E-Business Suite Release 12.1.1
Oracle Metalink Note 556540.1 Installing Oracle E-Business Suite Integrated SOA Gateway, Release 12.1
MetaLink Note 755069.1 -EBS R12 Packager and Adapters for External Application Servers
Step A: Perform the following steps for enabling Oracle E-Business Suite Integrated SOA Gateway Release 12.1:
1. Apply the following Oracle E-Business Suite patch:
Patch 9060361:R12.TXK.B: FSG: Log Location and Level Properties Not Accessible from OAFM
As with all EBS patches, you will need to verify that all pre-requisite and co-requisite patches have been applied successfully to the 12.1.x E-Business Suite via Auto Patch without errors. Be sure to review the readme instructions!
2. Set applications environment and stop all application tier processes.
From the applications instance $APPL_TOP, set the environment by running the APPS.env script
3. Shutdown the application tier processes for your EBS instance by running $ADMIN_SCRIPTS_HOME/adstpall
4. Run TXK development script to install Oracle Application Server Adapter for Oracle Applications as shown below:
$FND_TOP/bin/txkrun.pl -script=CfgOC4JApp -applicationname=pcapps -oracleinternal=Yes -oc4jpass=welcome -runautoconfig=No
5. Run TXK deployment script to install forms-c4ws.ear and configure container Forms-c4ws J2EE group correctly, as shown below:
$FND_TOP/bin/txkrun.pl -script=DeployForms-c4ws
6. Enable the new container forms-c4ws. (By default, the new OC4J container forms-c4ws will be disabled.)
To enable the new container forms-c4ws, modify the following values of context variables in the $CONTEXT_FILE:
Set 's_forms-c4wsstatus' to "enabled".
Set 's_forms-c4ws_nprocs' to "1".
7. Run AutoConfig. For information on how to run AutoConfig, see "Using AutoConfig to Manage System Configurations in Oracle E-Business Suite Release 12", My Oracle Support Knowledge Document 387859.1 for details.
8. Start all application tier processes for the instance by running the script $ADMIN_SCRIPTS_HOME/adstrtal
9. Enable ASADMIN user per details in the Oracle Metalink suport notes
10. Log on to Oracle E-Business Suite using sysadmin
11. Bounce the middle tier for R12 EBS environment
Part B: Configure SOA Suite with Release 12.1.x for Oracle Applications E-Business Suite
I will provide a summary of steps for the required tasks to configure the Oracle SOA Suite with Release 12 for Oracle EBS:
1. Register your installation of SOA Suite with R12 EBS instance per details from Oracle MetaLink Note 755069.1
This involves generating a new DBC file to use with SOA Suite and your EBS instance.
2. Create BPEL domains in SOA environment
3. Create JDBC connection pools in SOA instance for OC4J to access each EBS 12.1 instance
4. Define data sources between SOA instance and EBS 12.1 instances
5. Create Oracle adapter connection between SOA and 12.1 EBS instances
Hope this helps you to get started on your quest to configure Oracle Release 12.1 with SOA Suite Fusion Middleware!
Cheers,
Ben
The reference details are further contained and hidden away in a few key notes from MyOracleSupport (formerly Metalink):
Oracle Metalink Note: 755067.1 - Using Oracle BPEL 10g with E-Business Suite Release 12.1.1
Oracle Metalink Note 556540.1 Installing Oracle E-Business Suite Integrated SOA Gateway, Release 12.1
MetaLink Note 755069.1 -EBS R12 Packager and Adapters for External Application Servers
Step A: Perform the following steps for enabling Oracle E-Business Suite Integrated SOA Gateway Release 12.1:
1. Apply the following Oracle E-Business Suite patch:
Patch 9060361:R12.TXK.B: FSG: Log Location and Level Properties Not Accessible from OAFM
As with all EBS patches, you will need to verify that all pre-requisite and co-requisite patches have been applied successfully to the 12.1.x E-Business Suite via Auto Patch without errors. Be sure to review the readme instructions!
2. Set applications environment and stop all application tier processes.
From the applications instance $APPL_TOP, set the environment by running the APPS.env script
3. Shutdown the application tier processes for your EBS instance by running $ADMIN_SCRIPTS_HOME/adstpall
4. Run TXK development script to install Oracle Application Server Adapter for Oracle Applications as shown below:
$FND_TOP/bin/txkrun.pl -script=CfgOC4JApp -applicationname=pcapps -oracleinternal=Yes -oc4jpass=welcome -runautoconfig=No
5. Run TXK deployment script to install forms-c4ws.ear and configure container Forms-c4ws J2EE group correctly, as shown below:
$FND_TOP/bin/txkrun.pl -script=DeployForms-c4ws
6. Enable the new container forms-c4ws. (By default, the new OC4J container forms-c4ws will be disabled.)
To enable the new container forms-c4ws, modify the following values of context variables in the $CONTEXT_FILE:
Set 's_forms-c4wsstatus' to "enabled".
Set 's_forms-c4ws_nprocs' to "1".
7. Run AutoConfig. For information on how to run AutoConfig, see "Using AutoConfig to Manage System Configurations in Oracle E-Business Suite Release 12", My Oracle Support Knowledge Document 387859.1 for details.
8. Start all application tier processes for the instance by running the script $ADMIN_SCRIPTS_HOME/adstrtal
9. Enable ASADMIN user per details in the Oracle Metalink suport notes
10. Log on to Oracle E-Business Suite using sysadmin
11. Bounce the middle tier for R12 EBS environment
Part B: Configure SOA Suite with Release 12.1.x for Oracle Applications E-Business Suite
I will provide a summary of steps for the required tasks to configure the Oracle SOA Suite with Release 12 for Oracle EBS:
1. Register your installation of SOA Suite with R12 EBS instance per details from Oracle MetaLink Note 755069.1
This involves generating a new DBC file to use with SOA Suite and your EBS instance.
2. Create BPEL domains in SOA environment
3. Create JDBC connection pools in SOA instance for OC4J to access each EBS 12.1 instance
4. Define data sources between SOA instance and EBS 12.1 instances
5. Create Oracle adapter connection between SOA and 12.1 EBS instances
Hope this helps you to get started on your quest to configure Oracle Release 12.1 with SOA Suite Fusion Middleware!
Cheers,
Ben
Tuesday, February 16, 2010
Fusion Middleware Integration with Oracle E-Business Suite: Part I: SOA Suite and Release 12
In this series, I will explain in detail how to configure Oracle Fusion Middleware SOA Suite with the Oracle E-Business Suite for Release 12 Oracle applications. This post will cover how to install the Oracle 10g SOA Suite for Fusion Middleware. Part II will provide details on the actual tasks required to integrate Fusion Middleware components for the SOA Suite with E-Business Release 12.
First, download the SOA Suite files from OTN (http://otn.oracle.com). For this series, we will use supported configurations, as such SOA Suite 10.1.3.5.0 with Oracle Release 12.
Oracle Enterprise Linux 5.2 will be used as the platform for SOA Suite 10g with Oracle EBS 12.0.1.
Preparation
1a. Download SOA 10.1.3.1.0 from OTN or Oracle Edelivery
I recommend that you first review the Deployment Guide for Oracle Application Server 10g Release 3 (10.1.3.1.0) available from:
http://download.oracle.com/docs/cd/B31017_01/core.1013/b28939.pdf
Oracle® Application Server
Enterprise Deployment Guide
10g Release 3 (10.1.3.1.0)
B28939-03
In order to save you time and the 200+ pages of documentation, we can simplify the steps for installation of the Oracle 10g SOA Suite.
First we need to install and configure the schemas for the SOA suite. These schemas are deployed via the irca.sh script located under the ORACLE_HOME directory for SOA Suite after you unzip the files for SOA Suite.
1. Install schemas for SOA
$ cd /install/soa_schemas/irca
./irca.sh
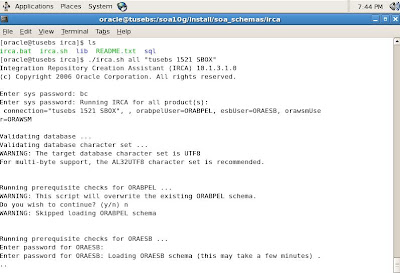
Verify that the SOA schemas have been created without errors.

The irca.sh script will generate a log file that outputs schema object creation
For example: my installation created a log file called irca2010-02-10_07-19-43PM.log

Now that we have created the schemas for SOA Suite and populated the schemas with required metadata, we are ready to install the SOA Suite. Unzip the files that you downloaded earlier and start the installation by executing the runInstaller script.
2. Install SOA suite
The splash screen will begin as long as all prerequisites have been met.
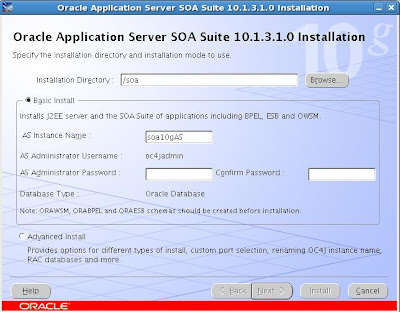
For our test SOA Suite deployment, I used the following entries for the 10g AS instance and administrator account (oc4jadmin):
AS Instance name: soa10gAS
AS administrator: oc4jadmin
Schemas
orabpel
oraesb
orawsm
Oracle:
sys
system/manager
EBS R12:
apps/apps
sysadmin/sysadmin

Next we need to enter details for the orainventory location:

After this runs, we need to run the orainstRoot.sh script as root user in another terminal window.

After the orainstRoot.sh script performs the oraInventory pointer file setup, we are ready to kickoff the installation for SOA Suite.
Now the Oracle installer (OUI) for SOA Suite runs the pre-requisite checks before installation begins. Since we are running an instance of EBS R12 already on the same server for test purposes, these already have been met to comply with kernel and system requirements for SOA Suite.

The installation begins after we confirm these are satisfied and on my test environment ran for a few hours since I have a slow 2Gb server with R12 EBS competing for resources with SOA Suite.

So after we take a break or lunch, we continue the installation.
Now we need to run the root.sh script in another terminal session as root.

We enter the prompts for directory and take defaults.

After a few hours, the installation process completes.
However, we have it fail at the end on configuration assistants during opmn (Oracle Process Manager) on a timeout process error. The solution to this issue which most likely is a bug in 10gAS (Oracle Application Server) is to stop opmn gracefully and kill any open opmn processes.
For reference, our test SOA Suite has the following details:
URL welcome page
http://tusebs.localdomain:8889
OEM 10g AS for Oracle 10g Application Server control and management
http://tusebs.localdomain:8889/em
Instance name: soa10gAS.tusebs.localdomain
Like most Fusion Middleware products, Oracle 10g Application Server is a cornerstone. However, future direction from Oracle appears to be that Oracle 10g Application Server will most likely be replaced eventually by Web Logic server.
Now that the installation has completed for SOA Suite, we need to apply a patch.
3. Install patch for SOA Suite
Download patch from OTN (http://otn.oracle.com)
$ unzip ias_linux_x86_101350.zip
$ cd Disk1
./runInstaller &

So after an hour or so, the patch for SOA Suite 10g completes and fails due to a bug most likely with SOA Suite.
Note: there is a bug in SOA suite due to issue with 10gAS with the opmnctl utility.
What happens is that the install will fail at end of the setup.
First we need to check status for the SOA processes.

Some tips on how to use OPMNCTL :

Uh oh, looks like SOA Suite processes are down.
The solution is to finish install for the patch and to manually kill the opmnctl processes for SOA suite.
Note: be careful to kill ONLY SOA suite opmnctl processes and NOT those for EBS Suite!
Use ps -ef|grep opmnctl to find the process ids and kill these. Then start opmnctl processes manually from the SOA ORACLE_HOME directory.
Run the following opmnctl commands from SOA ORACLE_HOME/opmn/bin directory:
$ opmnctl startall
$ opmnctl startproc ias-component=ASG

Now we need to restart the patch installer from SOA ORACLE_HOME directory and enter password for oc4jadmin screen
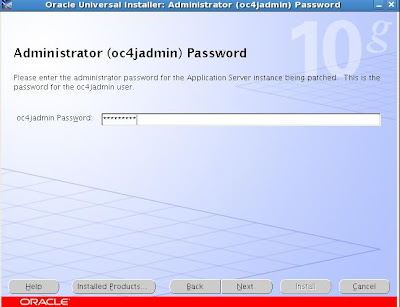
Next we need to enter password for OWSM schema

Click ok because it will shutdown the application middle tier for the SOA suite as part of the patch configuration process.

Now you will see the preview screen listing details for the patch with SOA Suite.
For the summary page, you just need to review and click ok to install the patch for SOA 10g Suite.

The patch takes about 30-90 minutes to run based on server performance. With my test server on VMWare with 2Gb of memory allocated to the VM, it ran about 90 minutes and was very slow because I also have a full blown R12 EBS environment installed.
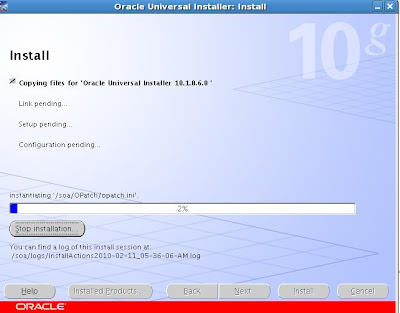
As part of the final configuration for the SOA patch, we need to run the root.sh script as root user to finish the patch for SOA suite.
# cd /soa
# ./root.sh
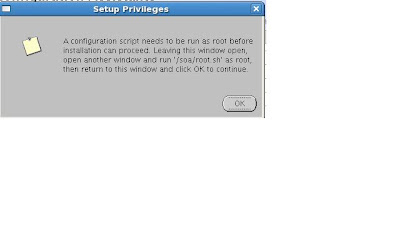
The root.sh script configures privileges required for the SOA Suite installation.
The patch installation completes successfully.

However we need to check and if required, start the processes for SOA Suite for 10g Application Server.
We use opmnctl to start and validate all processes for SOA suite are back online

Verify that SOA Suite is available and login to welcome page
Oracle 10g SOA Suite uses the following URL for default installation:
http://hostname:port
Example: http://tusebs:8889 will show 10gAS site
You can access BPEL and other SOA tools from this page
We need to verify that SSO is working for Single Sign on with SOA Suite
Navigate to http://tusebs:8889/BPELConsole

After we login to BPEL we can check the settings for the SOA Suite:

These settings will be used at a later point to configure SOA Suite for BPEL with Oracle Applications Release 12.

Now we also want to verify that all is functioning with the Oracle 10g AS environment since this plays an key role in SOA Suite operations. We navigate to the main 10g AS console site.
By default this is under the URL:
http://host:port/em
For example, our test server uses http://tusebs:8889/em

Stay tuned for the next installment when we complete the steps to show you how to integrate the Oracle 10g SOA Suite with Oracle E-Business Suite Release 12!
First, download the SOA Suite files from OTN (http://otn.oracle.com). For this series, we will use supported configurations, as such SOA Suite 10.1.3.5.0 with Oracle Release 12.
Oracle Enterprise Linux 5.2 will be used as the platform for SOA Suite 10g with Oracle EBS 12.0.1.
Preparation
1a. Download SOA 10.1.3.1.0 from OTN or Oracle Edelivery
I recommend that you first review the Deployment Guide for Oracle Application Server 10g Release 3 (10.1.3.1.0) available from:
http://download.oracle.com/docs/cd/B31017_01/core.1013/b28939.pdf
Oracle® Application Server
Enterprise Deployment Guide
10g Release 3 (10.1.3.1.0)
B28939-03
In order to save you time and the 200+ pages of documentation, we can simplify the steps for installation of the Oracle 10g SOA Suite.
First we need to install and configure the schemas for the SOA suite. These schemas are deployed via the irca.sh script located under the ORACLE_HOME directory for SOA Suite after you unzip the files for SOA Suite.
1. Install schemas for SOA
$ cd /install/soa_schemas/irca
./irca.sh

Verify that the SOA schemas have been created without errors.

The irca.sh script will generate a log file that outputs schema object creation
For example: my installation created a log file called irca2010-02-10_07-19-43PM.log

Now that we have created the schemas for SOA Suite and populated the schemas with required metadata, we are ready to install the SOA Suite. Unzip the files that you downloaded earlier and start the installation by executing the runInstaller script.
2. Install SOA suite
The splash screen will begin as long as all prerequisites have been met.

For our test SOA Suite deployment, I used the following entries for the 10g AS instance and administrator account (oc4jadmin):
AS Instance name: soa10gAS
AS administrator: oc4jadmin
Schemas
orabpel
oraesb
orawsm
Oracle:
sys
system/manager
EBS R12:
apps/apps
sysadmin/sysadmin

Next we need to enter details for the orainventory location:

After this runs, we need to run the orainstRoot.sh script as root user in another terminal window.

After the orainstRoot.sh script performs the oraInventory pointer file setup, we are ready to kickoff the installation for SOA Suite.
Now the Oracle installer (OUI) for SOA Suite runs the pre-requisite checks before installation begins. Since we are running an instance of EBS R12 already on the same server for test purposes, these already have been met to comply with kernel and system requirements for SOA Suite.

The installation begins after we confirm these are satisfied and on my test environment ran for a few hours since I have a slow 2Gb server with R12 EBS competing for resources with SOA Suite.

So after we take a break or lunch, we continue the installation.
Now we need to run the root.sh script in another terminal session as root.

We enter the prompts for directory and take defaults.

After a few hours, the installation process completes.
However, we have it fail at the end on configuration assistants during opmn (Oracle Process Manager) on a timeout process error. The solution to this issue which most likely is a bug in 10gAS (Oracle Application Server) is to stop opmn gracefully and kill any open opmn processes.
For reference, our test SOA Suite has the following details:
URL welcome page
http://tusebs.localdomain:8889
OEM 10g AS for Oracle 10g Application Server control and management
http://tusebs.localdomain:8889/em
Instance name: soa10gAS.tusebs.localdomain
Like most Fusion Middleware products, Oracle 10g Application Server is a cornerstone. However, future direction from Oracle appears to be that Oracle 10g Application Server will most likely be replaced eventually by Web Logic server.
Now that the installation has completed for SOA Suite, we need to apply a patch.
3. Install patch for SOA Suite
Download patch from OTN (http://otn.oracle.com)
$ unzip ias_linux_x86_101350.zip
$ cd Disk1
./runInstaller &

So after an hour or so, the patch for SOA Suite 10g completes and fails due to a bug most likely with SOA Suite.
Note: there is a bug in SOA suite due to issue with 10gAS with the opmnctl utility.
What happens is that the install will fail at end of the setup.
First we need to check status for the SOA processes.

Some tips on how to use OPMNCTL :

Uh oh, looks like SOA Suite processes are down.
The solution is to finish install for the patch and to manually kill the opmnctl processes for SOA suite.
Note: be careful to kill ONLY SOA suite opmnctl processes and NOT those for EBS Suite!
Use ps -ef|grep opmnctl to find the process ids and kill these. Then start opmnctl processes manually from the SOA ORACLE_HOME directory.
Run the following opmnctl commands from SOA ORACLE_HOME/opmn/bin directory:
$ opmnctl startall
$ opmnctl startproc ias-component=ASG

Now we need to restart the patch installer from SOA ORACLE_HOME directory and enter password for oc4jadmin screen

Next we need to enter password for OWSM schema

Click ok because it will shutdown the application middle tier for the SOA suite as part of the patch configuration process.

Now you will see the preview screen listing details for the patch with SOA Suite.
For the summary page, you just need to review and click ok to install the patch for SOA 10g Suite.

The patch takes about 30-90 minutes to run based on server performance. With my test server on VMWare with 2Gb of memory allocated to the VM, it ran about 90 minutes and was very slow because I also have a full blown R12 EBS environment installed.

As part of the final configuration for the SOA patch, we need to run the root.sh script as root user to finish the patch for SOA suite.
# cd /soa
# ./root.sh

The root.sh script configures privileges required for the SOA Suite installation.
The patch installation completes successfully.

However we need to check and if required, start the processes for SOA Suite for 10g Application Server.
We use opmnctl to start and validate all processes for SOA suite are back online

Verify that SOA Suite is available and login to welcome page
Oracle 10g SOA Suite uses the following URL for default installation:
http://hostname:port
Example: http://tusebs:8889 will show 10gAS site
You can access BPEL and other SOA tools from this page
We need to verify that SSO is working for Single Sign on with SOA Suite
Navigate to http://tusebs:8889/BPELConsole

After we login to BPEL we can check the settings for the SOA Suite:

These settings will be used at a later point to configure SOA Suite for BPEL with Oracle Applications Release 12.

Now we also want to verify that all is functioning with the Oracle 10g AS environment since this plays an key role in SOA Suite operations. We navigate to the main 10g AS console site.
By default this is under the URL:
http://host:port/em
For example, our test server uses http://tusebs:8889/em

Stay tuned for the next installment when we complete the steps to show you how to integrate the Oracle 10g SOA Suite with Oracle E-Business Suite Release 12!
Subscribe to:
Posts (Atom)